International Travel Planning: COVID Edition

We are in the end stages of planning an international trip, and while I expected a couple of ridiculous developments, I did not expect they would be with a) trouble finding a COVID test, and b) arguing with Verizon about international plans.

COVID DOCUMENTATION

I know you will be shocked SHOCKED to discover that the US has handled this poorly. Our PAPER vax cards are, technically, not accepted by the European Union because we are in the DIGITAL AGE ffs, and they view our crumpled paper cards with suspicion and some justifiable derision (there are indications that in real life, in some locations, the cards are OK, but who wants to get stuck?). The US is also not on the list of countries with reciprocal agreements with the European Union and it’s pretty damn embarrassing when 35 countries including Albania, El Salvador, Togo and even that pretend-country the Vatican have managed to figure out how to create an acceptable digital vaccination certificate, but the US has not.

Because we are this collectively stupid, US travelers have to have proof of a negative COVID test before entering some countries. We are heading to Portugal, a country that managed to get their entire adult population vaccinated very early on, and they require a negative COVID result at the airport. And it has to be “lab-certified” - at-home tests under video supervision, or through a pharmacy or clinic that can provide digital documentation.

This of course costs money. And requires not only time, but timing. With a Sunday evening flight that goes through Amsterdam before landing in Portugal Monday afternoon, a good-for-24-hours antigen test seems risky. What if we have flight delays? But - PCR test results, good for 72 hours, are still taking 1-2 days around here. Which takes up 24-48 hours of the 72-hour result window. I would have to get tested Friday afternoon for the result to still be valid Monday afternoon, and that assumes I would even have the result by Sunday.

Enter the “rapid test” choices. And the expense. A PCR test with a result in 15 minutes and the digital record sent to your phone or email? $125-300. I made an appointment for Sunday at one of the few local clinics that even offer rapid results - $135 each. Might be covered by insurance, but still - ouch. But that result should get us into Amsterdam, if needed, and then through Lisbon and even through our initial hotel check-in.

AND - GUESS WHAT? Those antigen tests we all got for free from the US government? CAN’T BE USED TO RE-ENTER THE US!!

INTERNATIONAL CALLING

Hey, I’ve done this before! I have used Verizon’s TravelPass plan for international travel. You are charged $10/day if you use it. Once you use your cellular connection, you are charged $10 for the next 24 hours. Don’t use cellular? Don’t get charged. (I have my cell data and roaming turned off for the majority of the trip - easy to get texts and emails wherever there is wifi). The plan then simply uses your domestic plan allowances - if you have unlimited talk and text, you get unlimited talk and text. The only downside is - perhaps? - some throttling on speed, but it’s not like I am downloading games or video in the middle of Lisbon. For a 17-day trip, I might fire up a cellular connection a few days here and there; even if I use it for 5 days, that’s $50.
I added TravelPass to my line, but was unable to add it to husband’s even after multiple attempts. I got on Chat #1, and the majority of the chat was the rep trying to sign me up for the $100/month international plan, because TravelPass would cost me $170. I replied that it would only cost me $170 if I used it every day. We then proceeded to have some version of this conversation multiple times until I finally asked if I had gotten connected with sales by mistake. The rep finally did what I had been asking and added TravelPass to the number.

OR SO I THOUGHT. Four days later, no TravelPass shows up in the Verizon account. I start Chat #2. And again with the sales pitch for the $100/month international plan, complete with a statement that with TravelPass we would be charged as soon as we started our trip. It would be $170 per line vs the $100/month/per line! I replied that was not how TravelPass worked. I could keep TravelPass in my plan for forever, and only be charged if I actually used cell service internationally. I resorted to copying and pasting entire lines of how TravelPass works, directly from Verizon’s website, into the chat.

Success. Finally. But…geez, people.

OTHER ODDS AND ENDS

Health declaration form - paper - to get through our connection in Amsterdam - check. Health declaration form - digital - to get into Lisbon - on tomorrow’s agenda. App for the BinaxNow proctored test downloaded and account set up - check. Laundry done, ready to pack - check. What to do about my interpretation of “adequate pairs of shoes” vs tour packing list vs what will fit in my carry-on….uhhhhhhh….

My Annual Holiday Baking Extravaganza Part Six (a series...with recipes!)

In Which, There Wasn’t Going To Be A Part Six, Yet Here We Are

gluten vs no gluten.JPG


One of these snowflake cookies is gluten-free.

I am not a gluten-free person, but I have friends who are for a variety of reasons. And because I am a nice friend (I am! Honest!), I have played around with gluten-free baking on occasion, and other than the coconut macaroons (and let’s face it, you could probably put sawdust in those things and they would still be fine)(do not put sawdust in them though), I have never been satisfied with the results.

Gluten-free flour mixes are expensive. Even the ones you can concoct at home usually have 4 different flours, plus xanthan gum - and that really starts to add up! So I was surprised to see a simple - really simple - blend on The Kitchn, using rice flour and tapioca flour.

Two ingredients. And I already had the rice flour. In fact, I had white rice flour and brown rice flour and both of them had “best by” dates of…<checks bags>…<whispers> 2017.

rice flour.JPG

Do I get fresh stuff when I am at the store getting the tapioca flour? Of course not.


Gluten-Free Flour Mix from The Kitchn

  • 1 lb white rice flour

  • 1/2 cup tapioca flour

Dump the flours into a bowl and whisk together. Measure out in same amounts as regular all-purpose flour in recipes.


I did not have a pound of white rice flour. So I did 1/2 lb white rice and 1/2 lb brown rice flour.

I used this mix in the chocolate sugar cookie recipe (also from The Kitchn). I figured the worst thing that would happen is the cookie would be too crumbly and maybe I would have to turn the dough into a pie crust or something.

Wait, that’s a lie. I figured the worst thing that could happen is that the chocolate cookie dough would taste terrible.

It didn’t. It was its usual delicious self. The texture was a bit grainier, which I would expect with rice flour. After chilling the dough for a couple hours, it was time for the ultimate test - baking test cookies. I made a couple of snowflakes and a star and popped them in the oven.

I also had a bit of royal icing leftover from my last decorating session. Am I doing everything wrong here? Yes. Yes I am. I gave it a stir, added some powdered sugar to half of it for piping (icing tends to thin out a bit after a day or two).

gluten vs no gluten.JPG


The snowflake cookie on the right is the gluten-free version. There is a texture difference in the gluten-free cookie that is minor (and some might prefer, actually) and the cookie spread maybe just a tad more but not enough, obviously, to ruin the shape.

I cannot show you the star, because I ate it.


My Annual Holiday Baking Extravaganza Part Five (a series...with recipes!)

In Which We Discover The Good, The Bad, and The Ugly of Royal Icing

IMG_4356.jpg

I have…well, had…a container of “mistake cookies” on the counter as proof that using royal icing takes some practice. My family will tell you that there is nothing wrong with a bin full of mistake baked goods (“mistake cakes” are also a thing here), and mostly they are right - they are all edible, tasty even, but just don’t meet my design and appearance standards.

So my first attempts at royal icing landed firmly in the mistake bin, and were consumed quickly. I just want to get that out there in case you decide to try to pipe some cookies the day before you need to take them to some gathering. JUST DON’T. Make a batch just to practice on (there also exists in the world, ceramic practice cookies, if that suits you better. Not sure it will help you with dealing with things like Santa’s beard though). And obviously - I am not a professional, so google some videos, find other sources, etc.

There are a ton of royal icing recipes out there, and they are all just a little bit different. The easiest ones call for meringue powder, which, depending on where you live, might be easiest to find online. It’s spendy, ($19/lb) but also will get you many batches of icing. I ordered meringue powder from Truly Mad Plastics (site recommended by our local commercial cookie baker, Krazy Kookie Mama), which also has all kinds of baking supplies and does custom cookie/fondant cutters.

And I ended up using the recipe on the back of the meringue powder bag - I got the best results with it, for producing piping-consistency right away with no need to add more sugar to thicken it up (that said, it can get runny after it sits for a day or two, so you may need to add more powdered sugar at that point).

Because I hate those cooking blogs that make you wade through 6 pages of narrative before they finally get to the recipe, here is the recipe! And more narrative after if you want to read it.

TMP Royal Icing Recipe

  • 1/4 cup meringue powder

  • 1/2 cup water

  • 1 tsp vanilla (optional - or use other flavoring)

  • 1 lb powdered sugar, sifted

In medium/large bowl, beat meringue powder, water and vanilla until peaks form. Beat in powdered sugar. Your mixture should be thick and somewhat fluffy. For piping, the icing should hold its shape a bit; for flooding you want it thick but to smooth out after a few seconds (there are LOTS of probably better descriptions for consistency online!).

I like the flavor of my cookies, so did not feel the need to jazz up the icing with any flavoring other than vanilla. But you can add whatever flavoring you want.


meringue powder.jpg

So the good - the icing is tasty and complements the cookie. You can do cool stuff! It sets up hard so you can stack cookies; you can freeze them iced if you want. You can use tips (about a $1 each at places like Michael’s) and if you are doing some precision piping, you might want to go that route (I used a #2 and a #3 mostly). Otherwise, it’s easiest to snip a tiny bit off the end of the bag (very tiny! practice this!).

The bad and the ugly overlap - this is messy as hell. And some bits - like snowman hats! - are difficult. Or at least, it is for me, even after icing something like 14 dozen cookies. It’s also wasteful - lots of plastic piping bags, lots of unused frosting. I tried piping using plastic bottles and it just did not work as well. And since it’s hard to gauge how much icing you’ll need in which color, you just can’t avoid tossing some away. Or eating it! Ha, ha, no, did I just say that? Maybe don’t eat it. Or don’t eat all of it.

So what special stuff do you need?

  • Meringue powder

  • Piping bags

  • Piping tips (optional)

  • Food coloring gels (important! Do NOT use the liquid food coloring, you will not get the color you want. Santa’s hat will be pink. Not that there is anything wrong with that.)

  • Fine tip brushes (for painting faces, etc)

  • Vodka (for drinks!)(oops, no, actually it’s for diluting the coloring gels for painting - evaporates fast so doesn’t make your icing mushy)(also, drinks)

To give you an idea of how I did what:

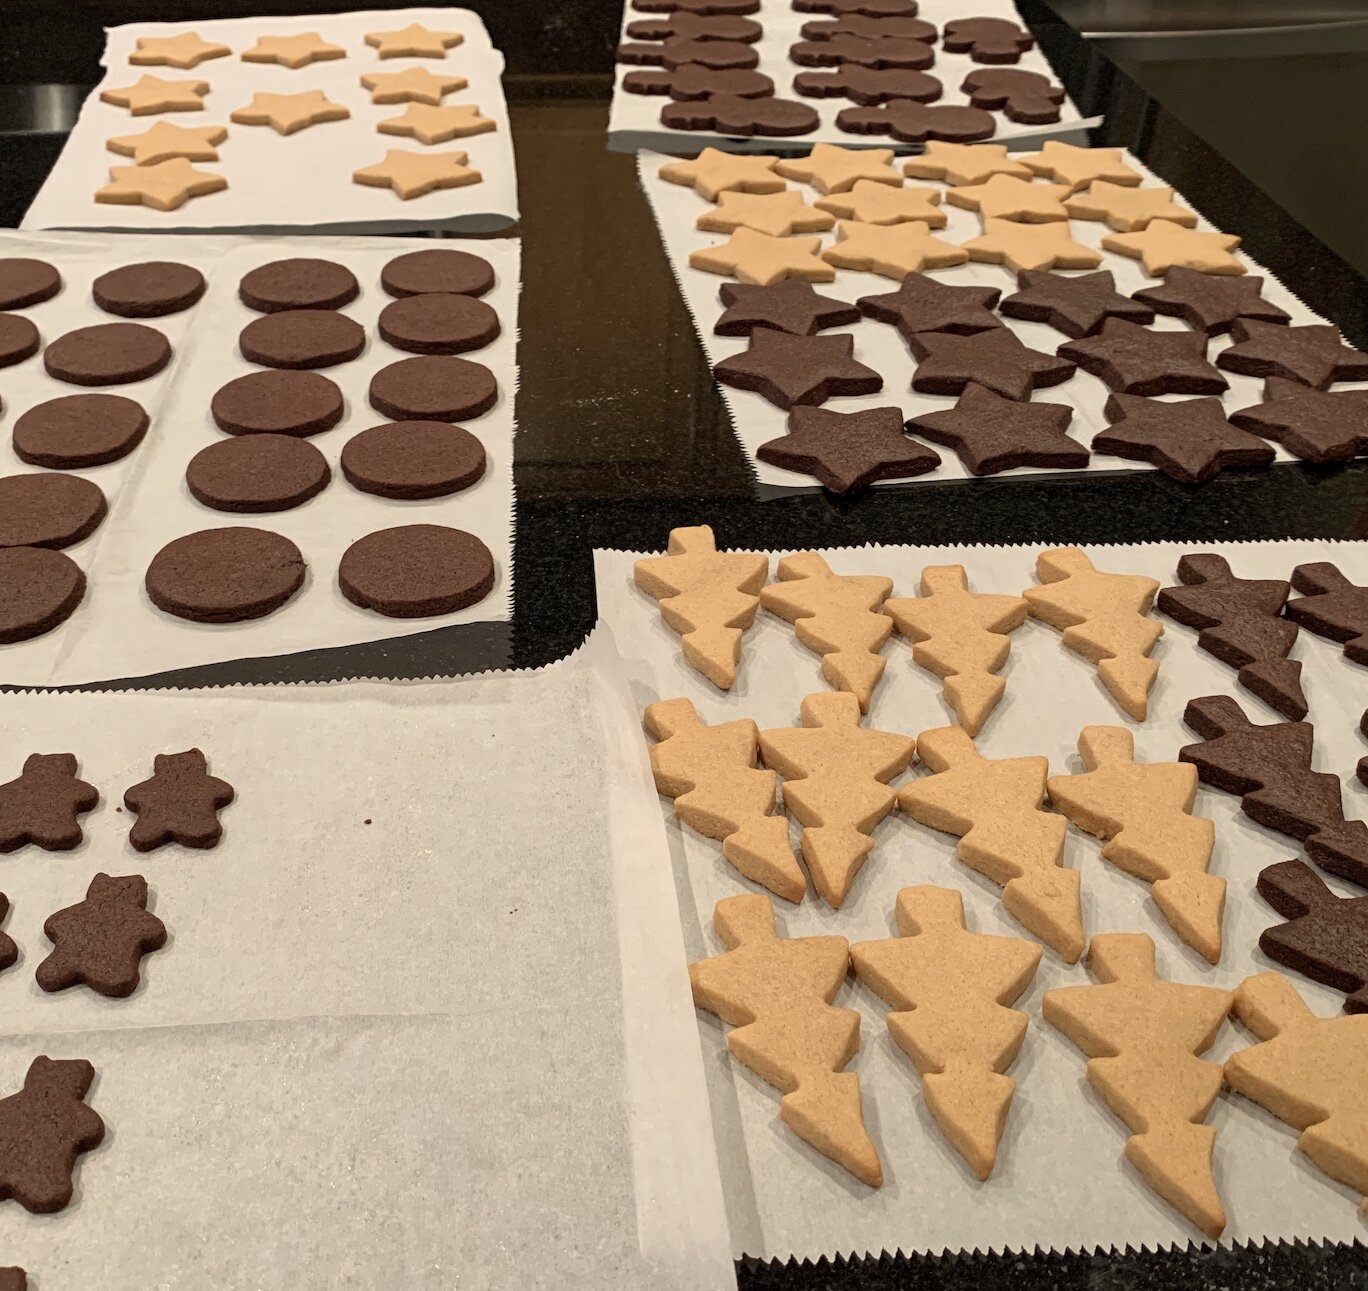
cutouts on baking sheet.JPG

You can be better than me and make up all your piping and flooding colors and bags before starting. I did not do this because I wasn’t sure how much I would need to do what. Err on the side of making too much of a color - flooding in particular takes more icing than you might think. Doing a TON of cookies? Make a batch of piping and another one for flooding, then color in smaller amounts as needed.

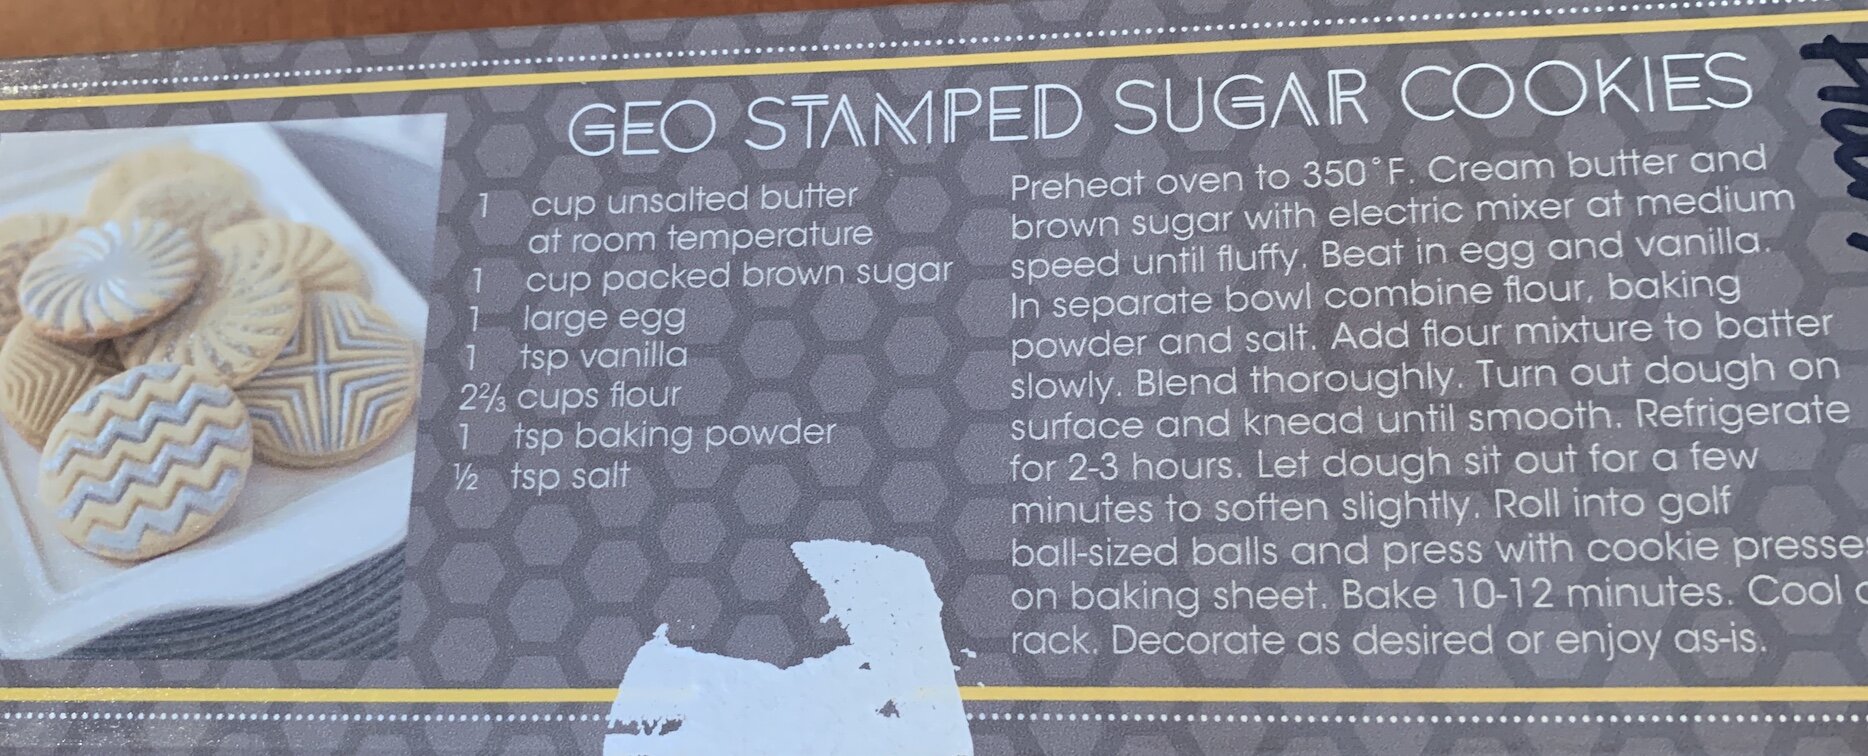
Pre-piping note on the stamped cookies: I used “luster dust” - about 1/8 tsp mixed with about 1/2 tsp vodka - to paint onto the cookie before piping. When shopping, read carefully - many are not “food grade.” Here is a better photo:

stamped with glitter.JPG

Piping: I used a #2 tip for most of these, mostly because I wanted to leave some cookies a bit plain for variety and for folks who don’t like a lot of icing (ahem, that would be…me). The tip gives the line a little more precision, which I like when there is no other decoration. Note on the stamped cookies - these are a pain in the ass, but they look cool and are easy to decorate, just follow the lines!

While the piping was still a little soft, I added any sprinkles so they would stick. The red balls on the trees in particular have to be done before the icing sets too much - just ask my cats how many of those they got to chase around the floor because they rolled off.

Flooding: If your icing is a good piping consistency, you will only need to add a tiny bit of water to get a good flooding consistency. Like, try 1/4 teaspoon at a time, depending on the amount of icing. Icing should smooth out after a few seconds. To apply, you can use a larger tip (#3 or maybe #5) or, just snip a bit off the end of the bag. It’s easiest to gauge how big a snip if you do it AFTER you fill the bag with icing. Ask me how I know this.

Like with the piping, you need to add your sprinkles before everything sets so they stick. The red balls (damn things) WILL roll off the snowman belly if you wait too long. They will also bleed into the icing if it’s too wet. You’ll figure it out.

The icing needs to be totally set before you paint any details, if you’re going to do that. I mean, a blob of black icing works just fine for snowman eyes, orange for the nose, etc - but honestly, I was kinda done making tiny batches of colored icing, and this seemed easier. One drop of color gel and a drop of vodka will get you a nice opaque color for painting.

Have fun, and enjoy the holidays! I am off to make some more mistakes! Hopefully, just with the cookies in my life.


My Annual Holiday Baking Extravaganza Part Four (a series...with recipes!)

In Which I Offer An Easy Gluten-Free (Or Not!) Option

coco macs choco.JPG

I don’t know about you, but I know exactly…zero people who don’t like coconut macaroons (not to be confused with macarons, a different - but also gluten-free - cookie. Or a Macron, who is not, as far as anyone knows, even a cookie). I often make these as a gluten-free addition to a cookie plate - and they are usually the first cookie to disappear.

This tried and true recipe is actually from the back of the Baker’s sweetened shredded coconut package. I use about half the sugar, and substitute the flour with a gluten-free option, usually white rice flour. You can find many variations of this cookie online - options include using unsweetened coconut, natural sweeteners, eliminating egg whites (usually subbing coconut oil or similar), maybe adding some almonds. It’s a versatile cookie, so you do you!

And because chocolate never ruins anything, I dip the bottom of mine in a bit of dark chocolate. You know, just to dress them up a little.

Coconut Macaroons

  • 1 bag sweetened shredded coconut

  • 1/3 cup sugar

  • 6 TBS rice flour or other flour

  • 1/4 tsp salt

  • 4 egg whites

  • 1 tsp vanilla

  • dark chocolate for melting and dipping (I use Trader Joe’s “pounder plus” dark chocolate bar, but chocolate chips work just fine)

Oven to 325.

Dump coconut into a large bowl and break up the lumps. Add sugar, flour, salt and mix. In a separate bowl, whisk the egg whites and vanilla until blended. Add egg whites to coconut and mix until well blended - mixture will start to bind together.

Using a tablespoon, measure macaroons and roll into balls (pro tip: use food prep gloves to prevent sticking, and for smoother surface). Arrange on cookie sheet lined with parchment. Bake for 20 minutes or until coconut starts to get golden.

When macs are cool, melt chocolate in microwave on medium-low setting. Pour some melted chocolate on a plate. Dip bottom of cookie into chocolate and return to parchment to set.


My Annual Holiday Baking Extravaganza Part Three (a series...with recipes!)

In Which I Offer An Easy Family Favorite

snowball cookies.JPG


Does the idea of making cutout cookies with the little ones make you twitch? It’s right up there with letting them decorate the tree, right? - and I am here for you. It’s possible we need a support group. But anyway. This recipe is from my mom, and we just called them snowballs. I have no idea if that is the real name or not, but when she gave me the recipe card, that is what she called them, so…

Original recipe from my mom - see below for some minor changes I made.

Original recipe from my mom - see below for some minor changes I made.

They are essentially a Russian tea cookie (so timely!) - butter, sugar, flour, egg. Add nuts and/or chocolate chips.

And then you simply roll them into balls and bake.

This is where that mild control-freak impulse is useful and important - you want the balls to be essentially the same size. And I find the easiest way to do that is to mush the dough into a tablespoon (the measuring one, not the soup one), and then roll it into a ball. None of this “shape into walnut-sized balls” business - who the hell knows what a whole walnut looks like these days? What if you’ve only ever seen super-sized mutant walnuts?

Do a bunch of these at a time, and hand the already-measured dough to the kids. They’ve all used Playdough, so they got this. Mostly. You can subtly fix lumps and funny shapes before baking, or you can roll with it (ha) and add mini-chocolate-chip eyes to the snakes and whatever other shapes they produce.

Snow snakes. That’s actually a pretty good idea.

I did make changes to the recipe. I do not bother to sift the flour, and I use the Bob’s Red Mill whole wheat pastry flour as it helps the dough keep a more rounded shape (all-purpose flour will still result in a circular cookie, but a little flatter). My family prefers no nuts, so I increase the chips.

Snowballs (edited version)

  • 3/4 cup butter, room temp

  • 1/2 cup sugar

  • 2 tsp vanilla

  • One egg

  • 2 cups flour (I use Bob’s Red Mill whole wheat pastry flour but all-purpose is fine)

  • 1/2 tsp salt

  • 1 cup chocolate chips, or nuts, or a combination

  • Powdered sugar (for rolling finished cookie)

Oven to 350.

Blend butter and sugar until fluffy. Beat in vanilla and egg. Add flour and salt. Dough will be a bit crumbly. Add the chips and/or nuts - you may need to mix with your hands.

Using a measuring tablespoon, press dough into spoon - do not overfill. Pry out and roll into balls. Place on ungreased cookie sheet or use parchment. Bake 15-20 minutes* or until edges are just golden. Cool and roll in powdered sugar. Makes about 2 1/2 dozen.

You can freeze them before covering with the sugar, then thaw and roll in the powdered sugar when ready to serve (My experience has been that if you freeze them with the powdered sugar on them, the sugar on the bottom of the cookie can get soggy after thawing).

*bake time should be the same for your snow snakes, unless they are really flat - in that case, check them at 10 minutes

My Annual Holiday Baking Extravaganza Part Two (a series...with recipes!)

In Which It Is Determined That The Only Thing Better Than a Sugar Cookie Is A Chocolate Sugar Cookie

Apologies again for my rudimentary icing skills here…but you get the idea.

Apologies again for my rudimentary icing skills here…but you get the idea.

Because, duh.

EXCEPT. There are an awful lot of chocolate sugar cookie recipes out there that are kinda…meh. It’s the worst kind of disappointment.

But I came across a recipe at The Kitchn, and read through it thinking, oh hey. This is a little different….and ran up against the classic cooking-in-a-small-town dilemma of ingredients.

Don’t worry - full recipe will be linked below!

Don’t worry - full recipe will be linked below!

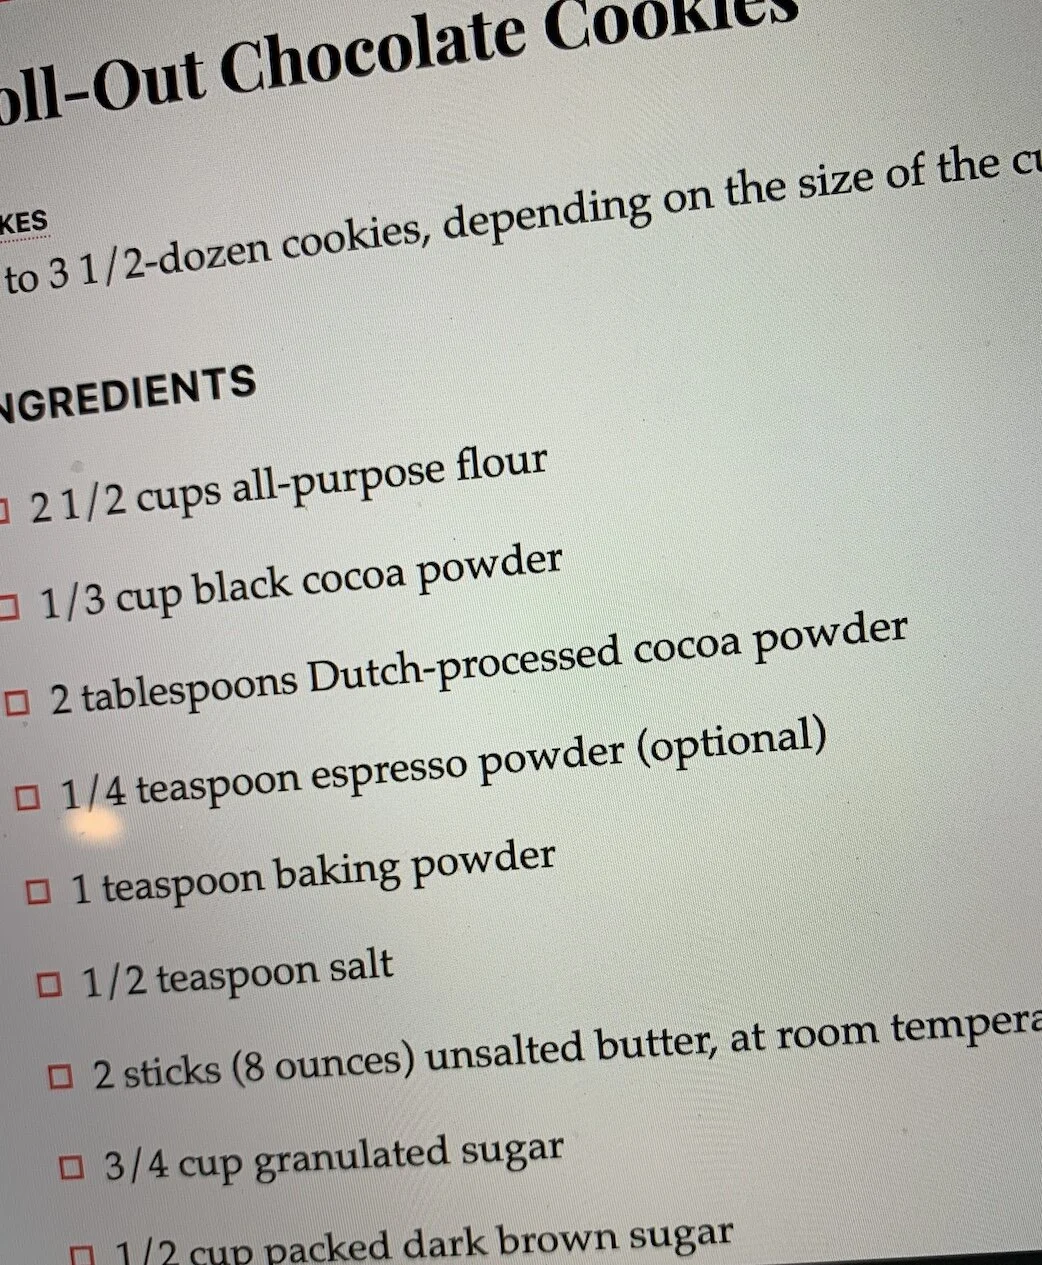
I did not have any dutched cocoa. Or espresso powder (is this a thing? or is it just coffee, pounded into dust?). And I don’t even know what black cocoa powder is. But one of the things I like about the Kitchn (and others) is that they have you covered here, explaining Dutch cocoa, and black cocoa, and then finally admitting that well, you can just use Dutch cocoa.

And the cookies - wow. The dough is chocolatey and delish, and firms up quite hard in the fridge. It also gets pretty sticky as it gets to room temp, so save yourself some time and mess and roll it between wax paper or parchment. Holds shapes really well, although I am not sure you can use a stamp - it seems too sticky for that. The baked cookie tastes amazing on its own, so requires very little in terms of icing to complement it (my royal icing layer is quite thin).

And I actually overbaked a sheet of these…and turned them into a perfect chocolate digestive biscuit. They still tasted great, and had that snap that everyone is inexplicably looking for on the Great British Baking Show.

The recipe for chocolate sugar cookies can be found here.